Building a DevOps Homelab: Foundation and First Container
After seven years at Charter Communications, I got my first real exposure to cloud infrastructure and the services that power enterprise operations. Watching how deployed services scaled, how infrastructure was managed, and how monitoring kept everything running sparked something.
The idea of building my own personal network accessible from anywhere has always intrigued me. Rather than relying on paid services and passing my data through multiple companies, the concept of self-hosting appealed to me. Full control, no subscriptions, and a hands-on way to learn production-grade infrastructure.
This homelab is about understanding how modern infrastructure actually works: containerization, infrastructure as code, monitoring, and security practices that translate to real-world environments.
Hardware: Working With What I Have
My current workstation (Intel i9-10900K, 64GB RAM) has enough resources to run virtual environments for testing infrastructure concepts before committing to dedicated hardware.
Why start with virtualization?
- Test different infrastructure buildouts risk-free
- Snapshots for easy recovery when experiments break
- Can destroy and rebuild quickly to try new approaches
- Simulates real cloud infrastructure
- Easy to scale up to multiple VMs for future Kubernetes clusters
Eventually, I plan to move to dedicated bare metal hardware for 24/7 hosting, but VMs let me validate the architecture first.
VM Specifications:
- Ubuntu Server 24.04 LTS
- 8GB RAM
- 4 CPU cores
- 50GB storage
- Bridged network adapter
Ubuntu Server Setup
I chose Ubuntu Server over Desktop for one simple reason: it’s what’s used in production. No GUI, no unnecessary packages, just a clean server environment I’d manage entirely through SSH.
The installation was straightforward - select language, configure network, partition the disk, create a user account, and enable OpenSSH server during installation.
Once the VM was up, I SSH’d in from my Windows machine using Windows Terminal:
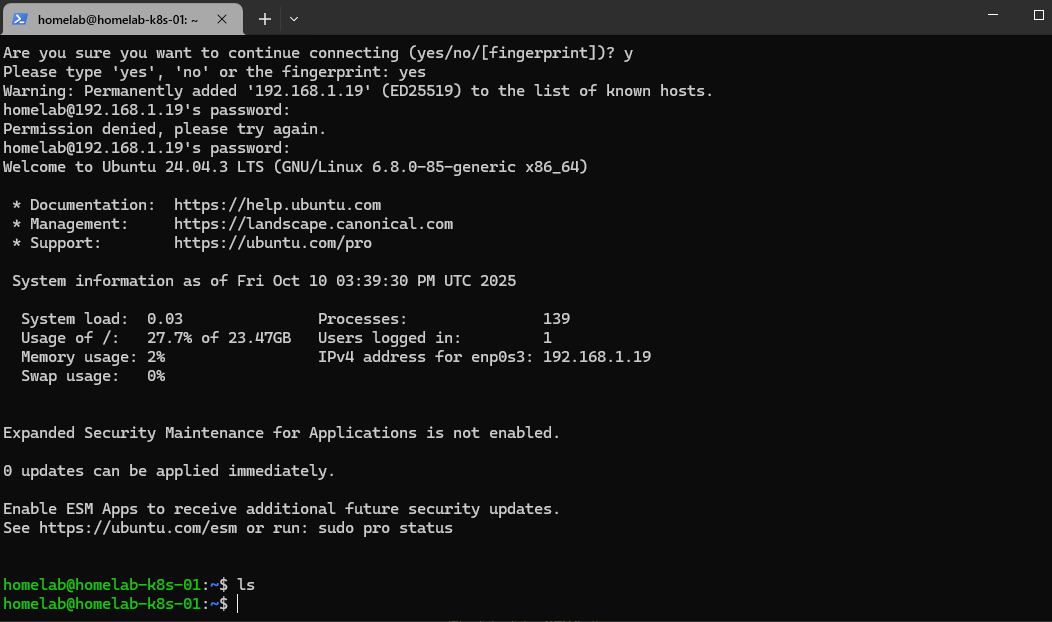 Successful SSH connection to the Ubuntu Server VM
Getting that SSH connection working felt like the first real milestone. This VM was now a proper remote server I could manage from anywhere on my network.
Installing Docker
With the base system ready, it was time to install Docker - the foundation of everything I’d build.
# Update package index
sudo apt update && sudo apt upgrade -y

# Install Docker
curl -fsSL https://get.docker.com -o get-docker.sh
sudo sh get-docker.sh

# Add user to docker group (avoid sudo for docker commands)
sudo usermod -aG docker $USER
 Updating system packages before Docker installation
After logging out and back in for the group change to take effect, I verified Docker was working:
docker run hello-world
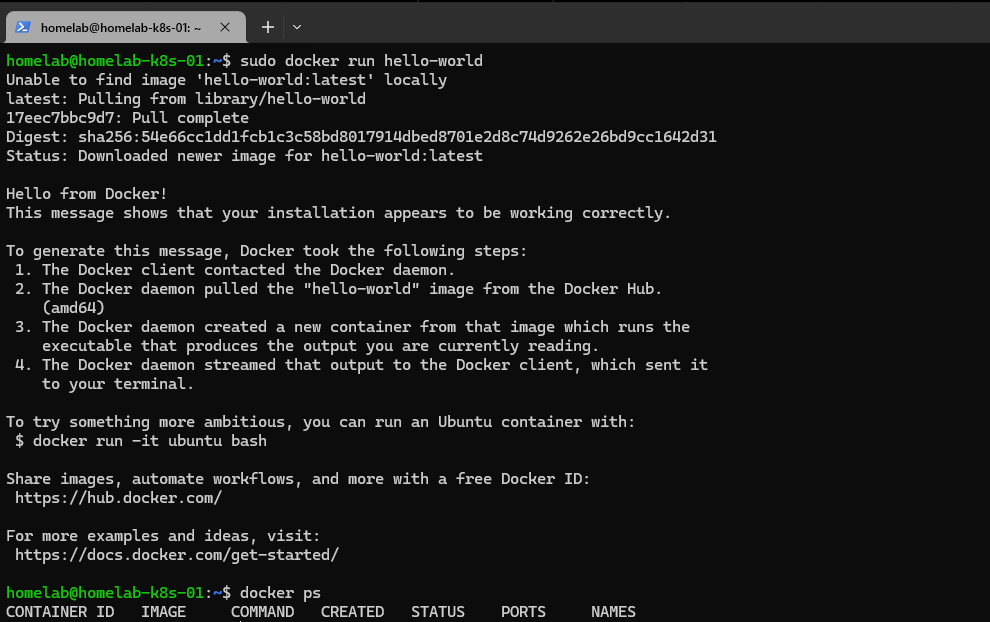 Verifying Docker installation with hello-world container
Seeing that “Hello from Docker!” message confirmed everything was working. Now for Docker Compose:
sudo apt install docker-compose-plugin -y
docker compose version
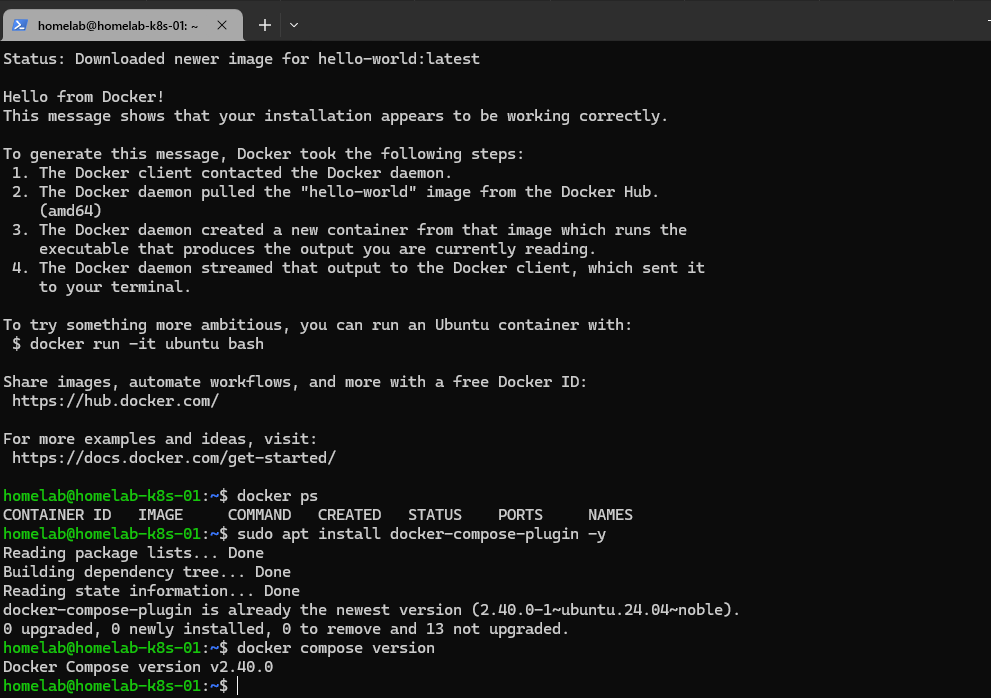 Installing Docker Compose plugin
Project Structure: Organization Matters
Before deploying anything, I set up a clean directory structure. Each service would get its own folder with a docker-compose.yml file and any necessary configuration.
mkdir -p ~/docker
cd ~/docker
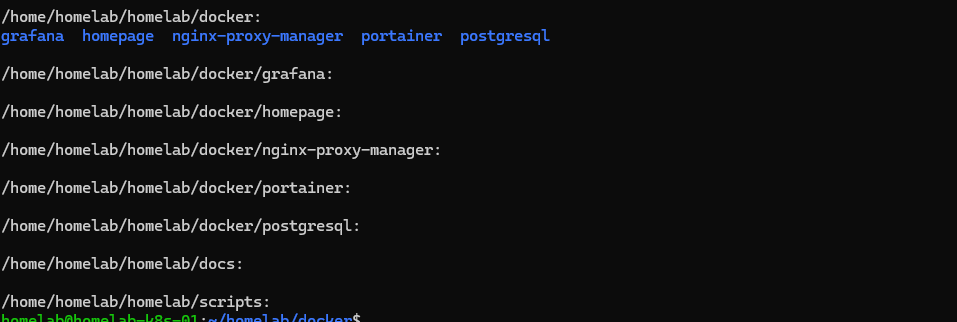 Creating organized directory structure for Docker services
This might seem basic, but organization matters. When this grows to 10+ services, having a clear structure will keep things manageable. Each service is self-contained and easy to understand.
First Container: Portainer
For my first “real” service, I chose Portainer - a web UI for managing Docker containers. It would let me visualize what’s running, check logs, and manage resources without memorizing every Docker CLI command.
I created ~/docker/portainer/docker-compose.yml:
version: '3.8'

services:
  portainer:
    image: portainer/portainer-ce:latest
    container_name: portainer
    restart: unless-stopped
    ports:
      - "9000:9000"
      - "9443:9443"
    volumes:
      - /var/run/docker.sock:/var/run/docker.sock
      - ./data:/data
Then deployed it:
cd ~/docker/portainer
docker compose up -d
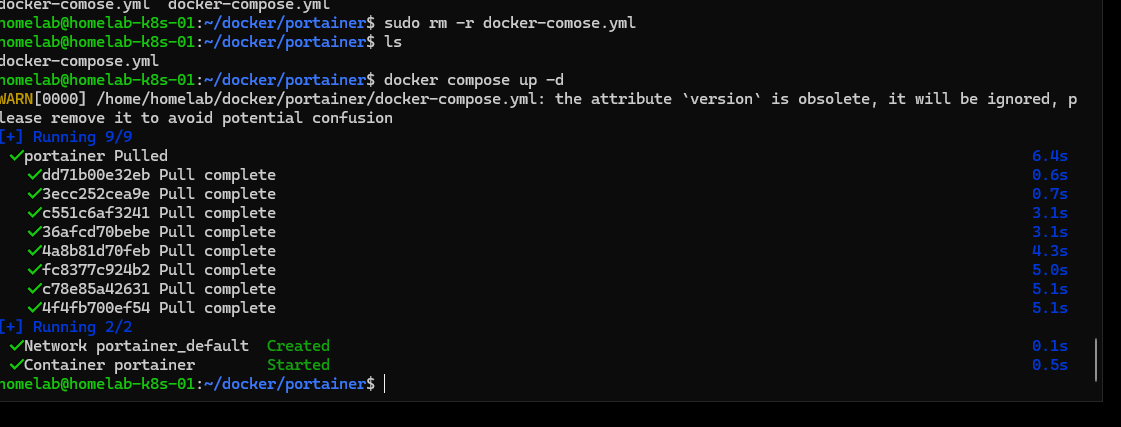 First container successfully deployed
Within seconds, Portainer was running. I opened my browser to http://192.168.1.19:9000 and was greeted with the setup screen. Created an admin account, and I was in.
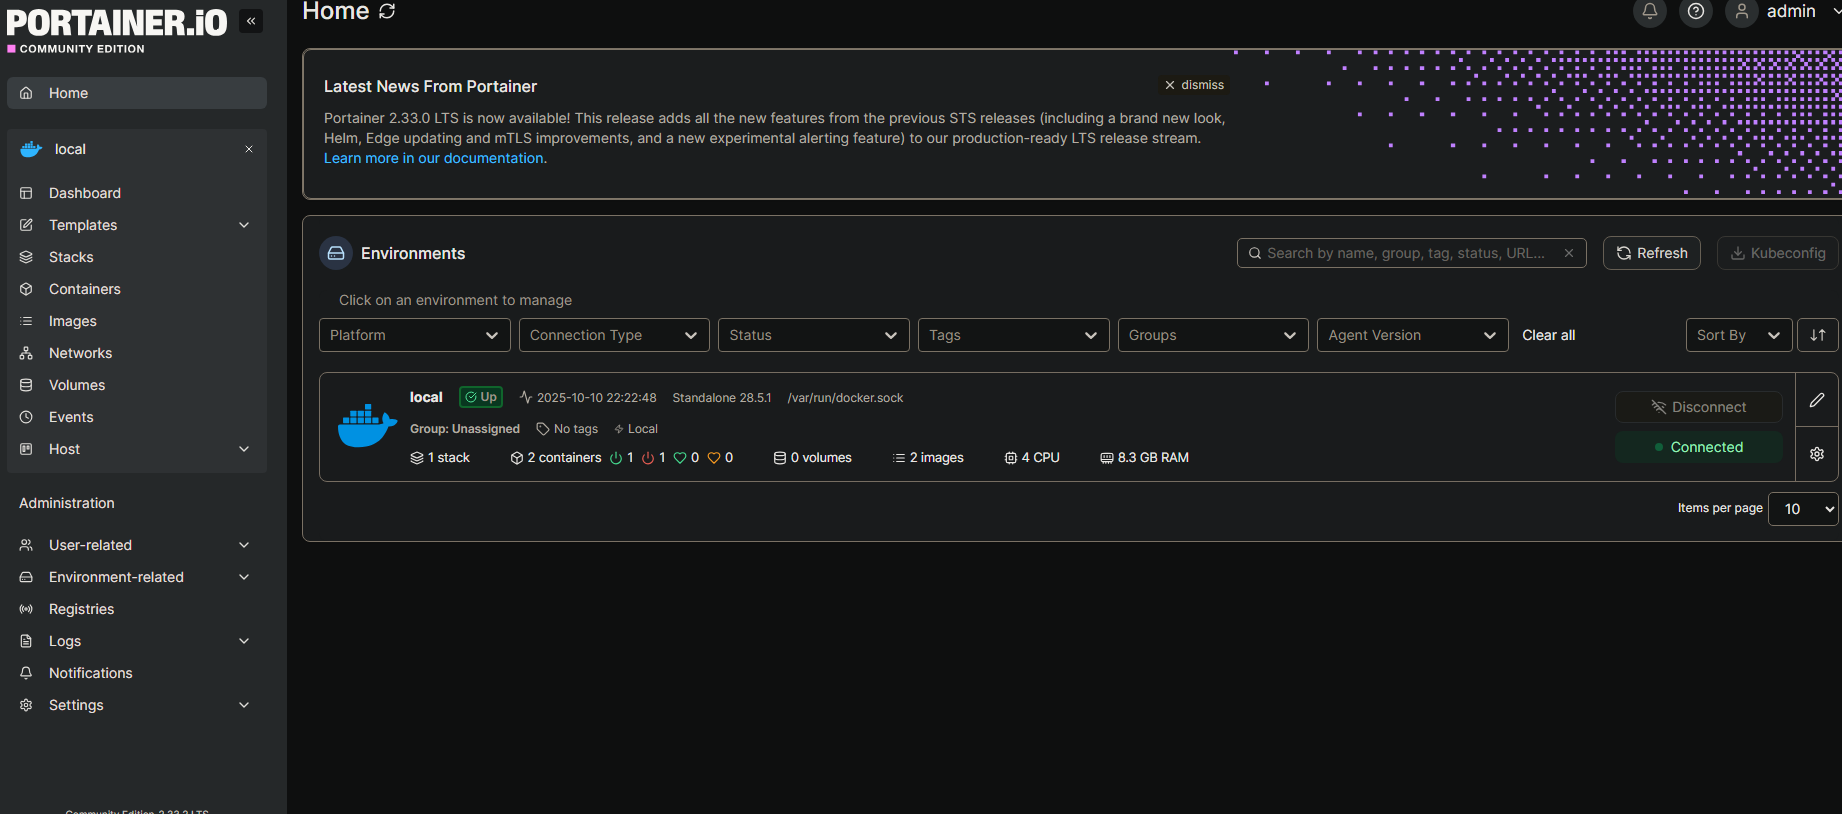 Portainer web interface managing Docker containers
This was the moment it clicked. I had a real service running in a container, managed by code, accessible via browser. This was actual infrastructure.
What I Learned
Infrastructure as Code is powerful: That docker-compose.yml file is the entire configuration. I can version control it, share it, destroy it, and redeploy it identically in seconds.
Start small, build up: I could have tried to deploy 10 services at once. Instead, I got one working properly, understood it, then moved on. Portainer taught me the workflow I’d use for every service after.
Documentation matters: I took screenshots and notes as I went. Future me (and anyone reading this) would thank past me for that.
What’s Next
Now that I have Docker running and Portainer managing containers, the next step is building out a service dashboard. I want a single Homepage that shows all my services, system stats, and gives me quick access to everything.
After that: Nginx Proxy Manager for reverse proxy, Grafana for monitoring, and PostgreSQL for database work.
Full code for this project: github.com/artezchapman/docker-homelab
Part 2 coming soon: Building a custom Homepage dashboard and troubleshooting configuration issues.
Have questions or suggestions? Find me on LinkedIn or check out the code on GitHub.